Well, after overcoming two viruses (one for me and one for my computer) I finally have the latest tutorial up. This tutorial will be part of a three part tutorial, all dealing with the same crackme ( a pretty hard one) called Crackme12 by Detten. In the first part we will go over how Windows messaging works. The second part will be about self-modifying code. In this part we will also crack the app. In the third and final part we will introduce bruteforcing. And you guessed it, in the third part we will bruteforce this binary. Each part will continue where the previous left off.
This three part series will be challenging, but I guarantee you that if you take your time and experiment on your own, you will gain critical knowledge in reverse engineering. And remember, if you have any questions, feel free to ask in the forum
. I will also give homework at the end of each tutorial that will help you prepare for the next one. This is where the real learning will come inAs always, the files you need will be available in the download of this tutorial on the tutorials
page. For the first part, the files include the crackme and a cheat sheet for Windows messaging.So, without further ado, let’s begin…
Introduction to Windows Messaging
In this tutorial we will talk about Windows messages and the procedures that handle them. In almost all programs, with the exception of apps written in Visual Basic *sigh* , .NET, or Java, tasks are accomplished through the use of a message driven callback procedure. What this means is that, unlike in the old DOS days of programming, in Windows you simply set up the window, providing the various settings, bitmaps, menu items etc you want displayed, and then you provide a loop that runs until the program ends. This loop’s sole responsibility is to receive a ‘message’ from Windows and send it to our app’s callback function. These messages can be anything, from moving a mouse, to clicking a button, to hitting the ‘X’ to close an app. When we make a Windows app, we provide this endless loop in our WinMain procedure, along with an address to call whenever a message comes in. This address is our callback. This loop then sends the messages it receives to our callback function with the address we provided, and in this callback we decide whether we want to do anything with this particular message, or simply let Windows handle it.
For example. we may display a simple message box with a warning in it and an OK button. All we care about is the message that says OK was clicked. We don’t care if the user moved the window (a WM_MOVE message), or clicks in our window outside the OK button (a WM_MOUSEBUTTONDOWN message). But when the message come thru that the OK button was clicked, that’s when we may want to do something. All of the messages we don’t want to handle, Windows handles for us. The messages we do wish to handle, we simply override Windows and do something with it.
The main procedure that sets up the windows and contains the loop is called WinMain and the callback is generally called WndProc if it’s a window, or DlgProc if it’s a dialog box, though the names can be anything.
I have included in the download a guide to all Windows messages that you should have open during the tutorial. You can download all of the support files on the tutorials
page. You can also download the windows messages cheat sheet on the tools page.
Loading the App
Go ahead and load Crackme12.exe into Olly and let’s have a look around:
This is what a standard app, written in C or C++ looks like when using a dialog box as the main program window.
*** If the program used a regular window instead of a dialog box, it would look different. see below.***
Notice the arguments being pushed onto the stack and the call to DialogBoxParamA. This sets up a dialog box to be used as the program’s main window (as opposed to a normal window, but don’t get bogged down in the details- it really doesn’t matter). Getting help on DialogBoxParamA we see:
For our purposes, the most important thing in this call is the address of DLGPROC. This is the address for the callback in our app that will handle all of the Windows messages. Looking back at the disassembly, we can clearly see this address:
In this case, it’s 40102B. Let’s head there and see what it looks like. This will be the…
Main Dialog Callback Message Handler
Here we can we the beginning of it:
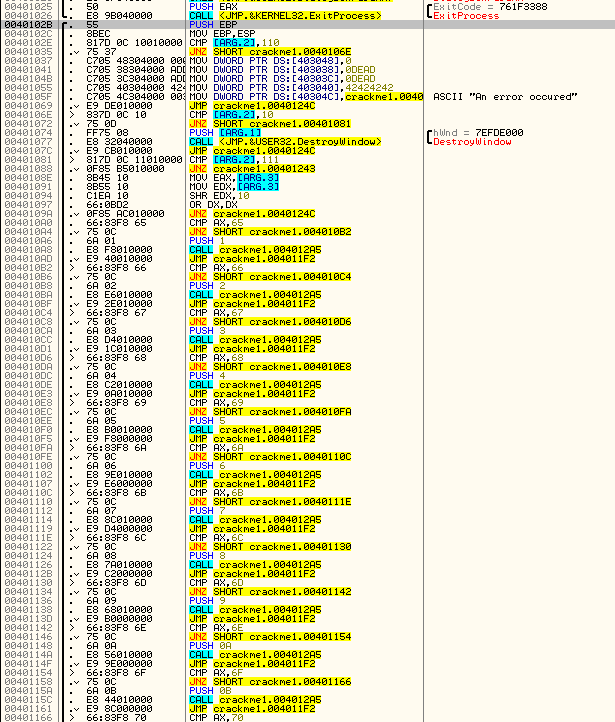
This is a fairly normal looking DlgProc. It is usually just a really big switch statement, though in assembly, it turns into a really big if/then statement. If you read through my last tutorial, this should look somewhat familiar, the only difference being that in this case, Olly could not figure out the case labels (ie. Case 113 (WM_TIMER)).
This procedure is here for one reason- to respond to the Windows messages that we wish to respond to. If you look closely, you will see a bunch of compare and jump statements. This is checking each section of code against the message ID that Windows has sent in. If the code matches one of these compare statements, that code is run. Otherwise, it will flow through all the compares, none will match, and it will be sent on to Windows for Windows to handle.
Let’s view this process a little closer. Go ahead and run the app:
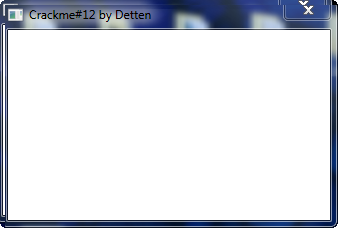
A very strange crackme, to say the least. Go ahead and play around with it. You will notice that you can continue to hit buttons and nothing happens, though it does have a ‘clear’ button. It seems that it wishes us to put in a specific code, and unless we do, the app will do nothing.
Let’s now put a BP on the beginning of the DlgProc code at address 40102B and re-start the app so we can watch the messages come in:
As soon as you start the app, we will immediately break at our BP. You will notice that a couple instructions in we start our first compare
40102E CMP [ARG.2], 110
If you look up ID 110 in the list of Windows messages included in the download of this tutorial, you will see that 110 is the code for InitDialog:
This message gives our app a chance to initialize some things. If you step through and the message is INITDIALOG, we will fall through and perform the instructions beginning at 401037.
Looking down at the info area we can see that ARG.2 is not 110 but 30:
In our chart, 30 is the message for set font. So this is the first message Windows is sending through.
The next compare is with 10, which in our message cheat sheet is WM_CLOSE:
So when the close button is clicked, this code will be run. The next compare is 111 which is WM_COMMAND:
WM_COMMAND is a catchall for several Windows message types, usually connected to resources, for example a button click or selecting a menu, or clicking a toolbar icon. In addition to a WM_COMMAND message, a second integer is sent in the ARG.3 holder that helps clarify the command message. For example, if you clicked on a button, a WM_COMMAND message would come through and ARG.3 might have the button’s ID in it. If you were drawing in a freehand draw program, ARG.3 may have the X and Y coordinates of where the mouse is currently:
Looking at this carefully, we can see that WM_COMMAND is the only other message (or really, collection of messages as each WM_COMMAND can be a different ‘type’) that this procedure handles. If you single step through you will notice that no code is run for our current message, WM_SETFONT, and we simply return at the end of our procedure. This tells Windows that we wish Windows to handle this message, not us:
Hitting RUN again we will break on the next message:
This time we see that it is a WM_COMMAND message. Stepping down to the compare that checks for this message at address 401081, we can then take a closer look at the WM_COMMAND handler:
Notice it moves ARG.3 into EAX and EDX. It then performs a SHR (shift Right) on the EDX register in the amount of 10 (or 16 decimal). It then OR’s this value, and if it’s not a zero, we jump. Basically this is checking if the fifth bit of this argument is a zero or not (you are reading that assembly book, right?). This is because the upper bits of EDX tells us the ID of the resource that has been affected. In this case, it is a zero, so we will jump over the remaining code and return from our callback:
Here we can see we are dealing with a 111, or WM_COMMAND message:
and here we can see the jump:
Running the app again, we again stop at our BP. This time we can see that we are dealing with a WM_INITDIALOG message:
So we are going to run the couple of lines at the top that are part of the initialization of this dialog:
In this particular crackme, this code happens to be important. We see that several integers are stored into memory starting at 403038 (they are accessed out of order and 403038 is the lowest). Let’s first bring that up in the dump window:
and see it is initialized to zeroes before we run these lines. Now step over the first MOV instruction and you won’t see anything happen, but a zero is copied into address 403048. Stepping over the next instruction we can see the effects though:
and here we can see that 0xDEAD was copied into memory (in little endian order):
stepping over the next line does the same thing, but at address 40303C:
The fact that they are words written in hex is a dead giveaway that it is important to this crackme ![]() . Next, the value 42 is copied 4 times at address 403040. We can see the ASCII equivalent of “B” in the ASCII dump area:
. Next, the value 42 is copied 4 times at address 403040. We can see the ASCII equivalent of “B” in the ASCII dump area:
Lastly, the integer 403000 is copied into address 40304C, which Olly can tell is a pointer to code or data beginning at 403000 (remember little endian):
Finally, we jump to the end and return, waiting for the next message sent through:
Clicking F9 a couple more times (10) you will see the main dialog window get created:
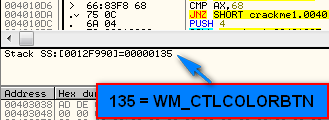
It gets very interesting at this point because as you hit F9, each time something new appears in the dialog box (after about 6 runs), as a message is received to draw that resource onto the screen. The next message is 135, or WM_CTLCOLORBUTTON:
which draws a button on the window:
and next is the button with the ’2′ in it:
At this point, clicking F9, you will actually see the dialog box get built, one button at a time. It’s interesting to see all the messages come in and look them up in our chart. You will see that there are a lot of messages that come through. If you don’t know one, just Google it and you can get a description of it. Toward the end, the label will be drawn at the bottom, and the “No access” text will be written to it. This will complete the window. I had to click F9 about 35 times before the window was complete:
So now you can see how a dialog box gets built. You set up the basics of the box, the title and the overall look, and you pass in a pointer (address) to a callback function that will handle all messages sent from Windows. Windows will then send a collection of messages, one at a time, to this callback, giving us the chance to run code at each message if we so desire. After the box has been completely built, Windows enters an inside loop that just sits there and waits for us to do something. As soon as we do, a message is sent to our callback with the appropriate ID of the action that has taken place. We can then decide to act on this message or ignore it and let Windows handle it.
One final thing you will notice is that, if the app is running in Olly, just moving the mouse over the window will cause Olly to pause at the beginning of the message handler with a new message. Windows is telling our handler that the mouse was moved over it. Basically, anything you do to that dialog box will send a message to our handler.
Homework
1. See if you can figure out what happens after clicking a button, especially to the memory contents starting at address 403038. Do the different buttons do different things? Can you begin to understand the code that is modifying these memory locations?
2. Take a guess on how long the password is.
-till next time
R4ndom


July 30th, 2012 on 7:24 pm
My olly did not show “ARG.2″ for example, and I found that I had to change the option under Options -> Debugging Options -> Analysis 1 -> “Show Args and Locals in procedures”
Hopefully this will help someone!
July 30th, 2012 on 9:32 pm
Yes, if the .ini file was changed, sometimes this can happen. Thank you for listing the solution.
July 31st, 2012 on 10:18 am
i guess it must be of 10 chars
i would guess something like 79DE624C4B
but it is only a guess.
July 31st, 2012 on 11:55 am
Nice one, waiting for the next tut
Greetings
September 6th, 2012 on 12:57 pm
Hi I read this tutorial and I got some questions if you don’t mind, I guess my ASM is a bit rusty:
1- At the part where it shifts right 16 times, and then OR’s itself, I didn’t understand how by doing this it is checking the 5th bit? and why does it want to check that bit? The ID thing is not clear.
2- How come DEAD was stored in little endian (AD DE) but not 42424242? is it because 42424242 = DWORD therefor it does not do the packing?
Sorry again I know this site is not about ASM, but I’ve re-reading the book and tried Google, it just did not click. So this is my last hope.
3- I am really considering learning WinAPI, do you recommend Charles Petzold’s book for today or is it outdated?
Thanks!
September 6th, 2012 on 3:35 pm
Will have to look up #1…
#2: 42424242 in little endian order is 42424242- It’s the same in little endian as big endian.
#3: I would recommend Petzold’s book. It actually is not dated, except for references to Windows 98. Everything in it works for Windows 7.
September 6th, 2012 on 4:10 pm
You’re right I guess tiredness really got me, can’t believe how I asked #2 I feel so ashamed.
Awaiting #1, I will read Petzold’s sometime.
Thanks!
January 24th, 2013 on 6:30 pm
“Basically this is checking if the fifth bit of this argument is a zero”
It’s checking the 16th bit if it’s right-shifting 16 times. I think you got confused by the fact it’s contained in the 5th hex digit.
August 10th, 2013 on 8:24 am
My homework
1)
4012A5, #buttons
401255, #About button
4011c8, #clear
3) 14 is the length? just a guess
September 1st, 2013 on 9:17 pm
it seems I can’t actually see the program while it’s running if it has stopped on a BP, therefore it’s kinda hard for me to tell when it’s fully loaded(when all the buttons have loaded).
any ideas? thanks.
btw, great tutorial. thanks a lot for your effort!
September 9th, 2013 on 11:15 am
Close all windows except OllyDbg’s window, and don’t make your OllyDbg’s window full screen. Then you will see the program when it stops on a break point.