Adding an Icon
Let’s start by adding an icon. Load up our HelloWorld project from the last tutorial. Click on Project->Resources. This will bring up the Resources window:
Click the Add button and enter in the following info for our icon. Make sure before you do this you copy the icon (supplied in the download) into the Res folder in your HelloWorld project directory. The name of the icon I included is called “clippy.ico”. If you wish to include your own, be my guest, just make sure it’s an .ico file:
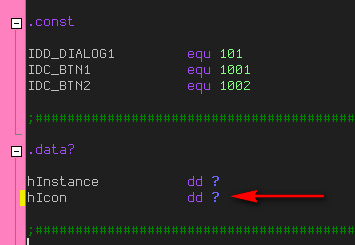
Now we’re going to register the icon with our program. The first thing we need is a global variable for the handle to the icon. Open up HelloWorld.inc and add this line:
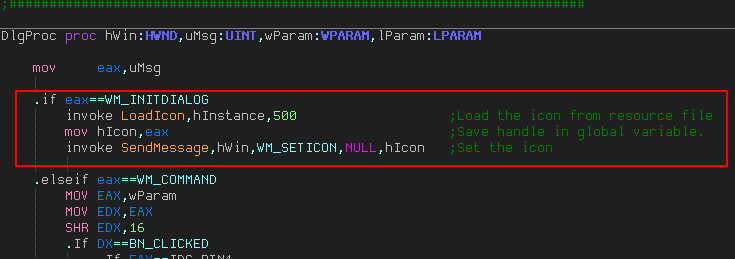
Now we need to actually load the icon to assign it to our program. We will need to add the appropriate code to the WM_INITDIALOG section:
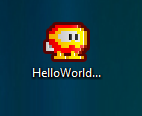
Now, after you build the project, you will see that the .exe file that RadASM has created has our new icon:
Adding a Menu
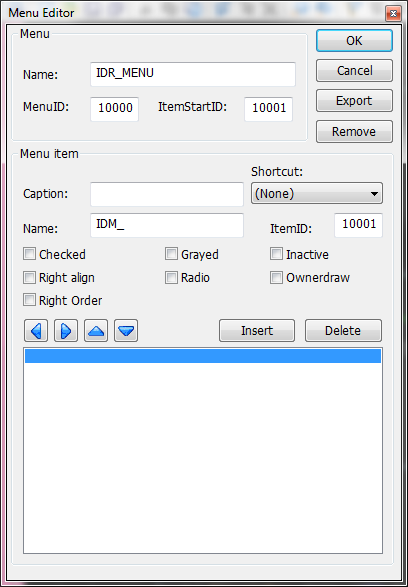
RadASM actually makes it quite easy to add a menu, as it has a menu resource editor built-in:
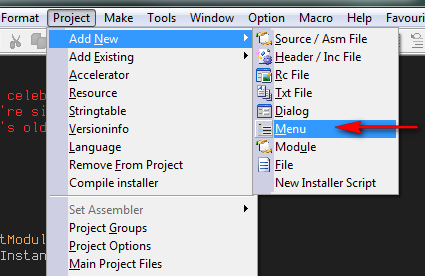
Clicking “Add new”->”Menu” under the Project menu will display the menu resource editor:
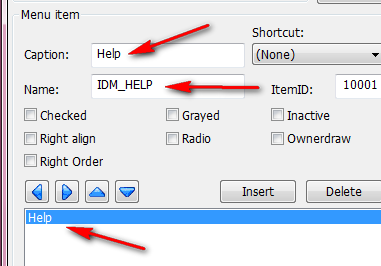
This editor let’s us create single button menus, drop down menus and multi-drop down menus (menus within menus). We’ll create a simple menu bar with two options; “help” and “quit”. These will not have drop-down capability. First, enter the information for the first:
Here, we enter the caption (the part that will be displayed) and the name. As soon as you enter these the item will display in the bottom box. At this point you can delete the item by clicking “Delete”, or you can edit it by just highlighting it in the box.
You also have the options to set the attributes of the menu item (for example, greyed out) and changing the item ID. In our case, we’ll leave it at 10001. You can also set up a hot-key for the menu item by clicking the “Shortcut” spinner. Like all other Windows IDEs, you can enter an ampersand (&) before any letter to make it an accelerator (for example, E&xit makes it so you just have to press the ‘x’ key to trigger the menu item.)
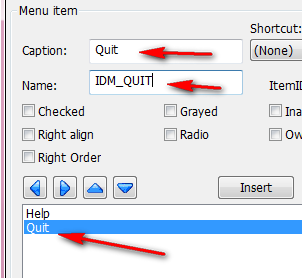
Let’s add our second. Click the empty line below “Help” in the bottom box which gives us a new item to modify:
At this point, if you wanted to insert an item between the two, you would simply highlight the first and click “Insert”. This will insert an empty item between the two.
Another thing you may have noticed are the four blue arrow icons. The up and down icons allow you to change the order of the menu items. The left and right one determine if the menu item is a header or a sub item. For example, let’s add a “File” menu, and when you click this, an additional menu drops from it with the option to “Save”. In this case, we would first create the File name ( at the top by highlighting Help” and clicking the “Insert” button):
We would then create the save item going in this menu by clicking the “Help” item and clicking “Insert”, then inserting the data for save:
Now, higlighting the “save” item and clicking the right arrow key makes this item a sub-menu item of the one on top of it, in this case the :File” header:
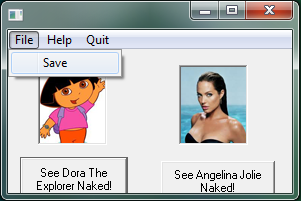
Now when we run the app, we see a new menu header with a Save option under it:
Note: For the sake of this tutorial, I deleted the “File” and “Save” menu items.
You will also notice, after clicking OK, RadASM has created our new menu in a .mnu file:
Any time you open this file, the menu editor will appear. If you open this file in Notepad, you can see what’s in it:
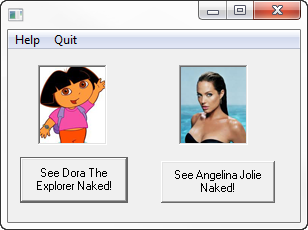
Now, when we run our program, we see our menu items automatically appear, Of course, they don’t do anything yet:
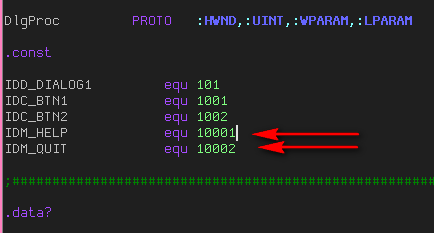
We need to add the code to handle he menu’s messages. First, the two lines shown need to be added to the HelloWorld.inc file:
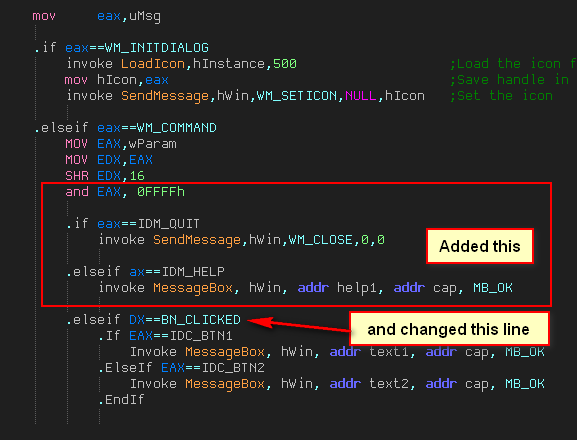
Then we need to add the message handlers into the HelloWorld.asm file:
Notice that, because the menu handlers had to go first, the “.if DX==BN_CLICKED” line was changed to “.elseif DX==BN_CLICKED”.
Finally, we need to add a new string so that our menu does something when you click “About”:
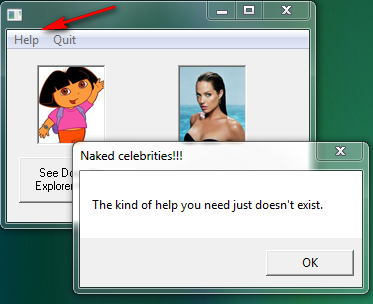
Now when we run our program, we can select our new menu items:







September 30th, 2012 on 1:24 am
Nice one again, thanks
October 4th, 2012 on 8:39 pm
It seems like an unusual way to create an icon for app, because when i have a CLI application i am can’t use this method ?
October 22nd, 2012 on 9:52 pm
What about the topbar icon?i thought it was related to the main one?
February 21st, 2013 on 5:20 pm
hey r4ndom,
you forgot to add an important thing in this tutorial,
a part about linking the menu to the dialog
If you have your .mnu file created, in order to see it you must go to your .dlg window, click on the dialog and in its properties set your menu file name in the “Menu” property
June 7th, 2013 on 7:34 am
Needed to send you one little bit of remark to say thanks again over the extraordinary suggestions you have discussed on this page. It is quite extremely generous with people like you to make freely exactly what many of us would’ve supplied as an e-book to get some money on their own, especially considering the fact that you might have tried it in the event you decided. Those basics likewise worked as a easy way to comprehend someone else have a similar keenness really like my very own to know very much more regarding this problem. I am certain there are many more fun occasions up front for folks who browse through your website.