We continue our tutorials on RadASM by creating a new project that creates a dialog box with two bitmaps and two buttons. You can download the required files in the download of this tutorial on the tutorials
page.
Creating Our First Project
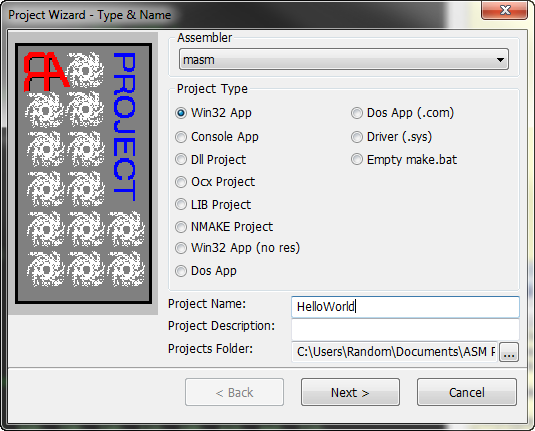
Let’s create our first Windows program. Select “New Project” from the File menu. This brings up the New Project Wizard:
The assembler drop down lists all of the various languages we installed at the beginning. In my case, I only have one: Masm.
The project type allows you to designate what type of project we will be making. Setting the different types allows RadASM to pre-make some files for you, along with setting certain settings that go along with your program type. For example, if you select “Dll Project”, files will be created to help set up DLL exports and such. For our first program, let’s keep it set to Win32 App. Type in a name in the Project Name field. I entered “HelloWorld”. The other fields can be left blank. Click “Next”.
Next is the template selection screen:
Templates allow you to pre-populate files with code templates. RadASM comes with several templates for Win32 applications, or you can write your own and save them. The “DialogasMain sets up a project using a dialog as the main screen. The Win32exe sets up a project with a single window but more callback message handlers. For now, select the “DialogApp.tpl” template and click “Next” This will set up a simple window project.
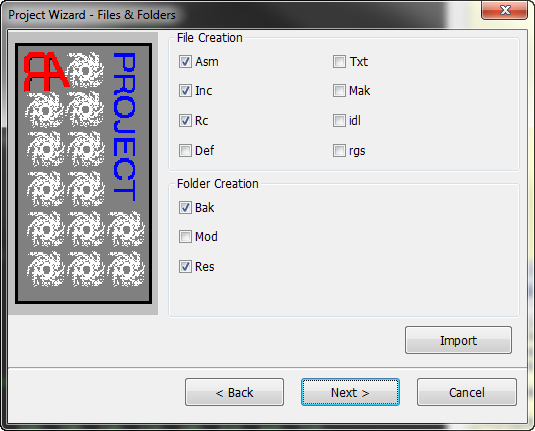
The next screen is the Files and Folders screen. this screen allows you to choose some files and folders you would like the program wizard to create for you. For example, if programming a Win32 application, we will probably want a resource file (.rc) as well as an include file (.inc). The Bak, Mod and Res options are for creating folders, so if you like to keep all resource objects in a Res folder, keep this highlighted. The Bak folder is a place to store backups of your project. Just leave everything as it is and select “Next”:
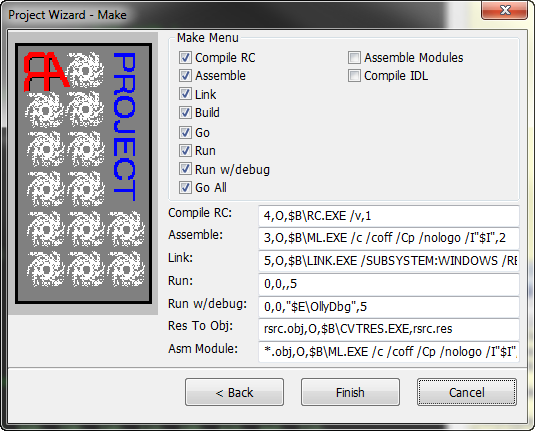
Finally, we reach the Make screen. This allows us to change the command line options, debugger, and the options we would like displayed on the “Make” menu drop-down. A lot of this is more advanced, so just leave everything as it is and click “Finish”.
You will see that RadASM has created several files for us already:
Let’s take a look at what files RadASM has created. First, double-click the HelloWorld.Asm file. This opens the code in the main window:
As you can see, RadASM has set up a skeleton app that displays a dialog, and has areas we can enter code for some basic message handlers. Next, let’s look at the HelloWorld.Inc file:
Here we have some basic includes, an ID for the dialog and a dword space set up for the instance handle. Now let’s look at HelloWorld.rc (skipping the .dlg file for a moment):
This just contains an include so we can have our .rc file in a folder (Res). Lastly, double-click the HelloWorld.dlg file. This opens the Dialog Editor:
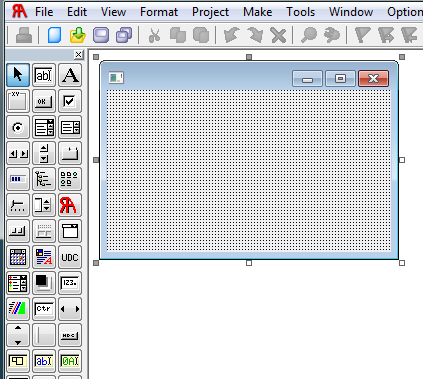
Notice we have a toolbar along the left-hand side. This is for adding elements to our dialog. This screen is also for changing attributes and IDs of our various dialog controls.
Now let’s run our new program. You can either build the target in steps (ie. assemble, link, run) or you can do everything in one step. These options are on the “Make” menu drop-down. Clicking “Go” assembles, links and runs the program. “Run” can be selected if you are re-running the app (after it has already been built). Also remember, any time you change the resource file you must rebuild it by selecting “Compile Resource”, though clicking “Go” will do this automatically.
Go ahead and select “Go” or click the appropriate toolbar button. If a
dialog pops up asking if you want to accept the command, select the
check mark “Don’t ask again” and click OK. Now our app’s dialog should
appear: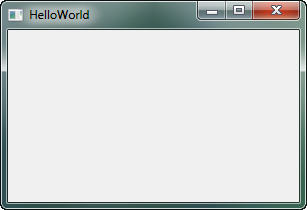
Not a lot to it, though this is only a template. Let’s spice it up a little…
Creating Some Controls
Let’s spiff up our dialog a little by adding some buttons and bitmaps. First we’ll add the buttons. Double-click on the HelloWorld.dlg file to open the dialog editor. Next click on the button tool in the dialog editor toolbar (it says “OK” on it). If for some reason the toolbar is not displayed, click on the little hammer and wrench icon on the main toolbar to display it. Then, click and drag a button in the bottom left-hand corner of the dialog:
RadASM will automatically name this button IDC_BTN. Now we want to change the attributes of this button, so while the button is highlighted, you will see the attributes in the bottom right of the RadASM window:
I have changed the caption (the text in the button) and have changed the button to display multiple lines. You will see the new caption show up in the button:
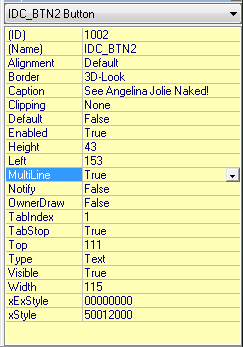
Now add another button on the right-hand side in the same way, setting it’s attributes to the following:
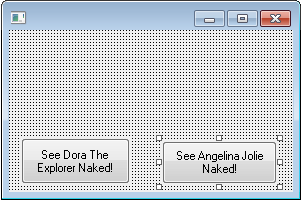
and the buttons will update in the dialog editor:
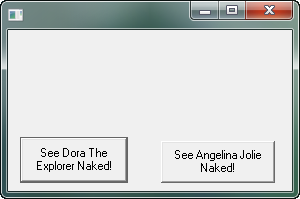
Now if you build and run the app, you will see our new dialog. Of course the buttons won’t do anything yet:
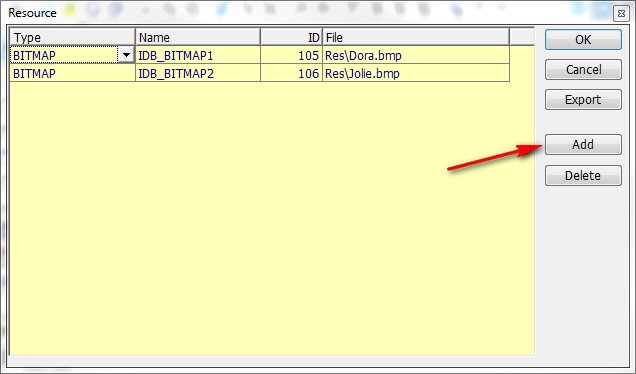
Next let’s add some pictures. Like any Windows application, we must load in the bitmaps as resources. Clicking the Resources option in the Project drop-down menu, we will be presented with the resource import screen. To add a new resource, simply click the Add button and fill in the information. When you get to the “file” column, click the three dots and drill to the resource folder and select the appropriate bitmap.
*** You should copy the bitmaps into the Res folder of your project. The bitmaps are available in the download of this tutorial. ***
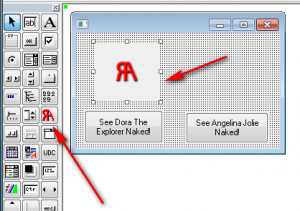
Notice I named the bitmaps IDB_BITMAP1 and IDB_BITMAP2. We will refer to these IDs later. Now, select the Image tool (the icon with the red “RA” in it in the dialog editor toolbar), then click and drag an image like I have done here:
Now we need to change the attributes of this image, pointing it at our resources we loaded earlier. For the ID number, I entered 105. We will refer to this ID in the HelloWorld.Asm file. I changed the name to match the name we gave our first resource in the resource import screen, IDB_BITMAP1. I added a border, changed the width and height to match the dimensions of the actual bitmap, and changed the type from “Icon” to “Bitmap”:
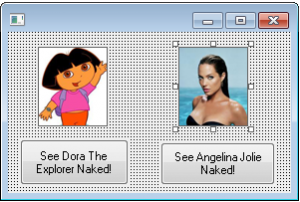
The image should appear in the dialog editor. Now go ahead and add another exactly as we did the first but this time on the above the Angelina Jolie button, naming this one IDB_BITMAP2 and changing the other attributes to match these:
You should see both images, along with our buttons in the dialog editor now:
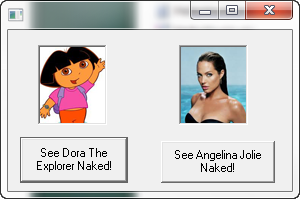
Building and running the app shows us the fruits of our labors:
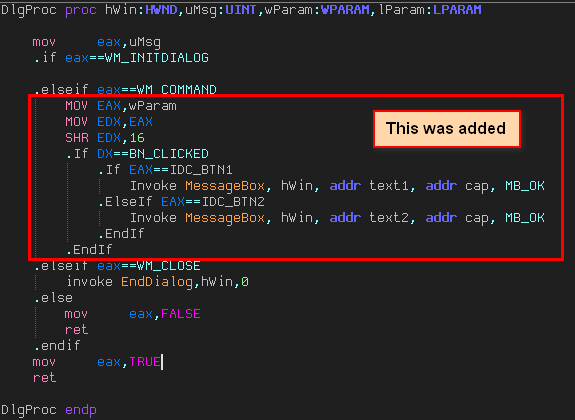
Now we must add the code to handle the events of clicking on the buttons. First, we will add the message handler for the two buttons. Load the HelloWorld.Asm file into the main window. We will make it so clicking on a button will display a message box. I will define the text strings for the message box in the next step:
Notice that eax is compared with the ID we gave the buttons, IDC_BTN1 and IDC_BTN2.
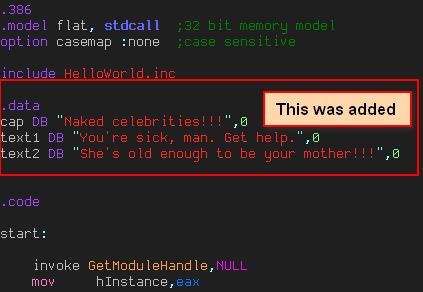
Now we can add the text strings to the top of HelloWorld.Asm:
Finally, we have to add the IDs we created for the buttons in the HelloWorld.Inc file:
Running the app now displays our wonderfully compelling and useful app:









September 27th, 2012 on 8:14 am
How can i see the code behind the dialog ?
September 27th, 2012 on 2:54 pm
Open it in notepad. That is one thing WinASM has over RadASM- you can view the actual code in the dialog file…
October 28th, 2012 on 3:10 pm
I am also interested but I am not sure which file to open as notepad?
Thanks.
September 30th, 2012 on 1:16 am
learning new things GREAT