Introduction
In this tutorial I will talk about patchers. A ‘patcher’ is a program that, after finding the patches to an app that makes it do what you want (bypass registration, show goodboy etc), a reverse engineer can use to apply these patches to a fresh copy of the program. Usually patchers are small programs that are sent with an un-modified program (for example, one you download from the manufacturer’s site). After running it, the patcher will apply the patches you wish to the un-modified program, and then the program will be ‘pacthed’.
For example, suppose you download a copy of The Most Awesome Program In The World that has a time trial on it. After investigating this app, you find the patch that, when applied, bypasses the time trial. Now I can set this patch in a patcher, telling it exactly where the instruction to be patched is, as well as what to change the instruction to. I can now send out this patcher instead of the whole Most Awesome Program In The World, telling others to simply download the app from the manufacturer and then run the patcher. When the user runs the patcher, the modifications that we set are applied and now this new app will be patched.
Another thing similar to a patcher is a ‘loader’, but I wil not be going over loaders until we get in to unpacking binaries. Stay tuned for that…
In this tutorial I will be patching a crackme called “Saturday Night Crackme.” Seeing as I didn’t want to get hung up on cracking the app, it is a relatively easy target, though I find it really funny (even though my family is about ready to kill me as it can get on your nerves). I will also be using dUP2, a patcher made by Diablo2002, as well as CFF Explorer. As always, you can download this tutorial on the tutorials
page. You can also download CFF Explorer on the tools page.
Loading the App
When starting the target, we see a very colorful image for the target’s main screen:
If you have your sound turned up, you’ll also experience what is sure to win a Grammy, the Saturday Night Crackme Theme Song (it’s not bad until you’ve been playing with the crackme for about a week, then people start getting hurt!)
Entering a code:
And clicking the Dance! button , we see the badboy:
Patching the App
Let’s load the target in Olly:
Searching for strings, we see where to go right away:
and jumping to the badboy, we see:
where the badboy is created. Scrolling up top see where the badboy creation is called from we see:
Placing a BP here and running the target we break on this JNZ. Now normally we would change the zero flag on this, then step through to see if the badboy is called. We would then come back and patch every jump to the badboy, changing it to NOT jump. But seeing as our goal is simply to display a goodboy, let’s just change this JNZ instruction to jump to the goodboy instead- that way we don’t have to actually enter anything, which will default to an incorrect code, and will jump to the goodboy automatically. We can see the address of the goodboy is 4016C3:
So change the JNZ to the bad boy to a JNZ to the goodboy:
Applying the patch and running the target we see that no matter what we put into the code box (except the real code ![]() ) will take us to the goodboy:
) will take us to the goodboy:
We will come back to the specifics of this patch after we learn about dUP2002…
Introducing dUP2
There are a couple patchers out there, but dUP2 is definitely the de-facto patcher. There are basically two different ways to create a patch; 1) Offset patch, and 2) Search and Replace patch. An offset patch is when you know the exact offset into the file where the patch should be made. This option is generally used when using Olly, finding the patch manually, and knowing exactly where it is. To perform this patch, you enter the offset (distance from beginning of file) of the patch, along with the modifications, and dUP2 will create a runnable program that will perform the patches you added.
The second type, Search and Replace, is used if you know the instructions you want to change, but don’t know exactly where in the file they are, or, if the program is self modifying, the areas to patch may change every time you run the target, so a specific offset is not possible. Search and Replace works exactly that way- it searches for a string of instructions, and when it finds them, it replaces them with your modifications.
dUP also allows patching to the registry (this would work against our
time trial target- you would just run the patch every 255 times and
voila- you have 255 more tries ![]() ) We won’t be going over registry patches, but their covered in the dUP2 help files.
) We won’t be going over registry patches, but their covered in the dUP2 help files.
You can also have dUP2 extract other files when it runs, perfect for if you have created a replacement data file or key file. When you run the patch, the installed .ini file will be replaced with your own.
Laslty, dUP2 allows custom skins (the default is not a lot to look at :S ). It just so happens that nwokiller in the Super Secret Elite Cracking Squad has created a custom skin for this tutorial, so we will be using that.
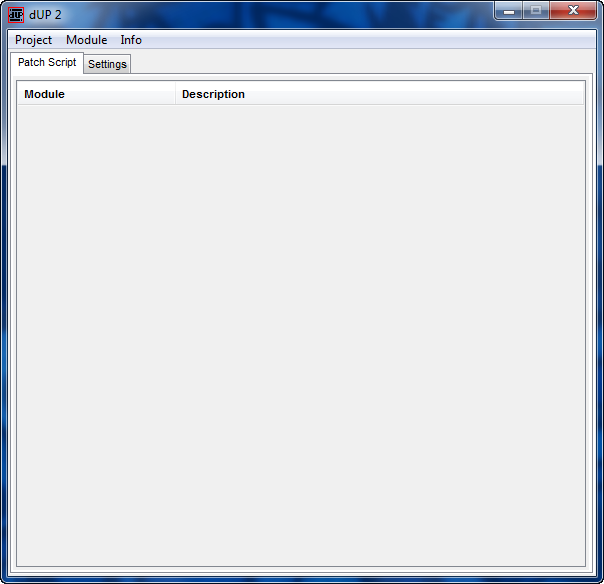
Starting dUP, we are presented with the beginning screen:
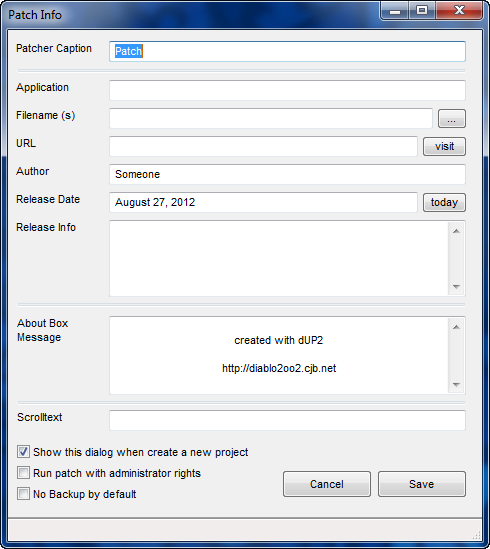
Choosing “Project” -> “New” brings up the new project screen:
Here we can enter some attributes of our patcher.
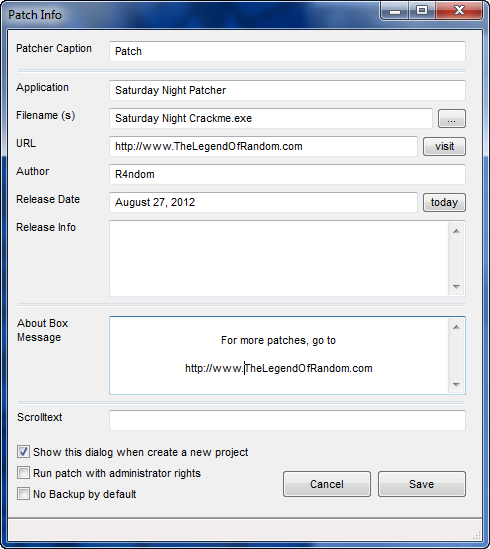
Patcher Caption: This is the text that will be in the title of the patcher window. I entered “Saturday Night Patcher”.
Application: This is the name of the target and wil be displayed at the top of the patcher. I entered “Saturday Night Crackme”.
Filename: This is the path to the target. I drilled down to our crackme.
URL: An optional URL. I entered “http://www.TheLegendOfRandom.com”.
Author: The super sleuth who created this. I put “R4ndom”.
Release Date: Obvious
Release Info: Here we could put notes such as instructions to copy a .ini file or what to do after applying the patch.
About Box Message: Obvious. I entered some Legend of Random crap.
Scroltext: A scrollable text bar that appears at the bottom of the patcher window.
and finally, I leave the checkboxes as they are.
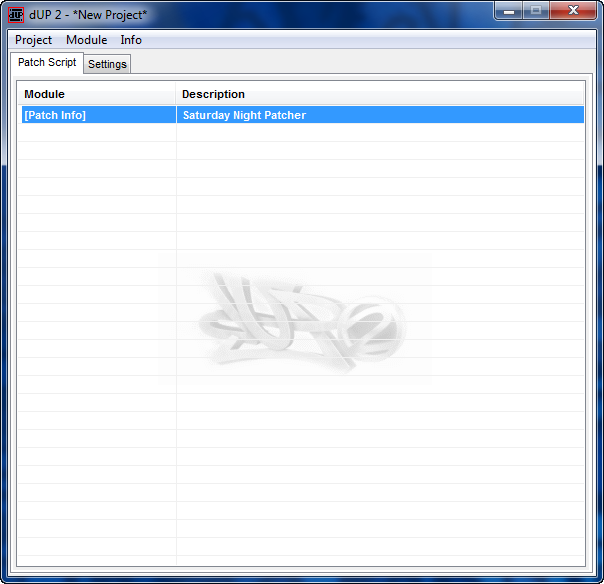
After clicking Save, we come back to the main screen but now it has some info in it:
Usually at this point I’ll save the project. Double-clicking the line of info ([Patch Info]) will bring up the project settings screen again in case you entered something incorrectly.
Now we want to add a patch. Right-click on the Saturday Night Patcher line and select “Add” then “Offset Patch”. This adds a new line into our project:
and double-clicking on this new line brings up the main offset patch window:
This screen is where we will enter all of the patch info. The first box is for the target file. Click the “…” button and select the target.
The “Old Filesize”, “New Filesize” and “CRC32″ boxes are for when an application uses CRC checking. Since our target does not use CRC, we can leave these as they are.
***CRC checking is a method used to prevent patches as well as corrupted or ‘modified’ files (think malware). This method checks every byte in an executable when the program first runs to make sure no bytes have been changed from when it was initially released. It then uses a simple algorithm to make a unique CRC ‘key’. If any bytes are changed, this key will change. CRC stands for Cyclic Redundancy Check.***
The ‘Patchmode’ group allows you to choose either an offset based on the binary file, an offset based on Virtual Addresses or an RVA. In our case, we will use the default.
The ‘Compare Files’ is a handy tool that allows you to compare two
files, the original and the patched version, and create a patch based on
the differences between the two. Usually used to make a patch if you
have a patched file but you didn’t patch it, but I sometimes use this if
I deleted the project and need to remake a patcher ![]() . We won’t be using this feature as we know what the patch should be.
. We won’t be using this feature as we know what the patch should be.
The main data area is the ‘Add and Edit’ group. Here, we enter each patches offset, original byte value, and new byte value.
Creating the Patcher
The first thing we need to do is write down the address, original values, and new values for our patch. Reloading the target and going to our patch code, we see that the address is 401554. We can also look in the opcodes column and see that the original bytes are “0f85 7A010000″, or in a more pretty fashion, “oF 85 7A 01 0 00″:
Now, enabling the patch in Olly, we can see the new bytes:
We can see that we really only changed one byte; 7A changed to 69 at
memory location 401556. So to patch this target, we simply need to
change the 7A, at address 401556, to a 69.
The next thing we need to do is find the offset into the binary of our
patch. Because the location of our patch in the binary (raw data on
disk) will be different than the address after the target is loaded into
memory, we must find the location in the actual binary file. We could
also use “Search and Replace” in this case and it would do the search
for us, but I usually like to find the patch in a hex editor in case
there happens to be more than one group of hex bytes that match our
search string. I will use CFF Explorer since we’ve used it in previous
tutorials, but you can use any hex editor you wish. Opening the file in
CFF, then clicking the “Hex Editor” option, we can see the raw hex data
of our binary:
Click on the magnifying glass to run a search. We then need to enter the hex values we are looking for. I usually include at least a couple of instructions in case there’s duplicate code somewhere else. In this case I’ll enter the opcodes starting at the line before our patch at address 401551, and including the full instruction at our patch at address 401554:
and click the find button. CFF will then show us where these values are:
Here, we can see that the offset for the byte we need to change is at offset 956 (6 bytes past offset 950). Now it’s back to dUP2.
Let’s enter the data now. We put in 956 as the offset, 7A as the old value and 69 as the new value:
After clicking the “Add” button, we see our patch in the list of patches:
Clicking “Save” then adds our info to the main window:
Now select “Project” -> “Create Patch”. A file dialog will pop up. Enter the name of the patcher and select “NO” on whether to run it now or not. You will now have a patcher for the Saturday Night Crackme:
Running the patcher, we see the display screen:
and clicking the “Patch” button:
we can see that the patch was successful. It also created a backup of the target. Running the target we see that it was successfully patched:
You may now send out a patcher along with this crackme and anyone who wishes may apply the crack and patch the target. Remember, the patcher must be in the same folder as the target.
Using Search and Replace
If we instead wished to use the Search and Replace functionality, instead of adding a new offset patch we would add a search and replace patch. Right-click in the main list and select “Add” -> “Search and replace patch”. Double clicking on this line in the main display then brings up the Search and Replace info screen:
Select the target and click the “add” button:
Now, we will enter the same information we entered into CFF to find the hex bytes, changing the 7A to a 69:
You have the choice of replacing all the byte patterns in the target or a specific number of them. This is why I went through the step of finding the patch in a hex editor- I could be positive that there was only one set of these specific instructions. In this case just select “Patch All” and click Save. We now have our new Search and Replace patch in the list:
Now click “Save” and create the patcher just like before. If you run the crackme you will see that it has been patched as well, just like our offset patch.
Putting Lipstick on the Pig
Because the normal skin on the patcher is quite plain, let’s add a skin as well. Thanks go out to fellow SSECS team member nwokiller for creating the skin.
To add a skin, click on the “Settings” tab. Fill out the settings screen, pointing the custom options to the skin files (contained in the “SSECS cUP skin” zip file in the downloads of this tutorial):
Now, when we create the patcher, we have an awesome looking program that screams excitement!!!
-Till next time.
R4ndom


August 29th, 2012 on 1:56 pm
thanks
September 29th, 2012 on 5:05 pm
Hello, i’m trying to extract the fugly mp3 for completing the tutorial but i seem to do something wrong,i believe the mp3 is loaded at 00401078 and its 36e9b bytes long so i tried to dump this section by doing a binary copy of said bytes and save the result as a mp3 but obviously it doesnt work can you enlighten me?:) thanks
also why did you make the tutorial not “advanced” ? its a pretty cool crackme such a waste to patch it
June 25th, 2013 on 12:38 am
Hello, I was just wondering how to make a patch like this one below…
“IDM v6.xx.release.5-patch” (find in google)
What it does is search & replace (SNR) but the thing about
this particular patch is…
It offers to add a “First and last Name” to the the .exe
file in question leaving the product registered to any
individual.
How can we add this “add name” feature in dup2…?
Can anyone help…