Introduction
In this tutorial we will be removing a nag from a ‘real’ program. In an attempt to help out the author’s, who spend a great deal of time creating these apps, I have attempted to pick an app that will do the least amount of harm. This time, I did a Google search for “Cracked Software” and this program came up with the most hits, including tutorials, serial numbers, keygens, you name it. Because it is so incredibly easy to get a crack for this app, I figured someone would probably not have much trouble getting it anyway. But please, if you do like it, pay for it.
We will also be adding a couple tricks to our arsenal for reverse engineering. One note, if you are running these tutorials under 64-bit windows 7 (like I am), Olly 1.10, even my version, the call stack trick will not work. My suggestion is to do what I do: Run Olly 2.0 just to perform the trick (and get the correct address) then switch back over to my version of Olly for the rest of it. Or just use Olly 2.0- there are a lot of nice features in it and it has been fixed to work properly with 64-bit operating systems.
You can download the files for this tutorial on the tutorials
page.
Investigate The App
This program comes with the restriction that after 40 days (probably a
biblical thing?) a nag will appear, and trust me, I know from
experience, it is very naggy. Unfortunately, since the nag doesn’t
appear for 40 days (and 40 nights? -sorry) you have two choices; you can
install the app and wait 40 days before reading this tutorial or you
can simply set your system time to today plus 41 days, do the tutorial,
and reset the date back to today. Make sure you do one or the other
before doing the tutorial or it won’t match ![]()
and after a second…
This nag pops up. It pops up a lot while using the app. It is highly annoying. Also, we can see at the top ‘evaluation copy’:
I am going to show you two ways to get to the relevant code.
The First Way
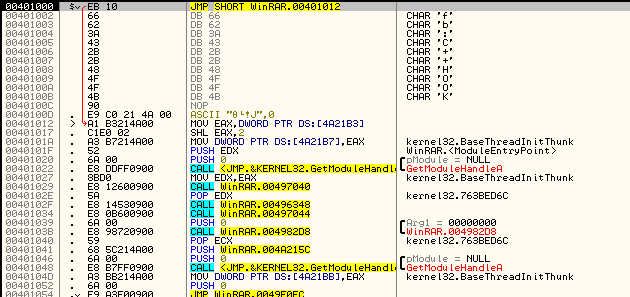
So let’s load it in Olly and get started:
Start the app and wait for the nag to appear. Once it appears (and before closing it) click in Olly and click the pause button (next to the play button):
Now, we want to find out where that nag came from, and ultimately, what decided to show it. Of course we could search for strings or intermodular calls, but I guarantee you that these tricks will not be helpful for a lot of apps out there. So let’s learn another trick…
The Call Stack
The call stack is Olly’s attempt at tracing through the code that got us here and trying to figure out which functions were called. It also attempts to show you arguments that were passed to the function. All of this can be accomplished by using the ‘normal’ stack in the bottom right, but the call stack is a much nicer view of this data. Keep in mind that Olly is not perfect at this, though, and you can’t use everything in this window as gospel (oops, I did it again). There is a lot of guessing going on. Also, many times, this window will be blank. This is usually caused by Olly getting completely lost or when reverse engineering a Visual Basic program (VB programs don’t call functions the same way as real programming languages do).
To view the call stack, click the “St” button if using my version of Olly:
Or, if using the default version of Olly, click the ‘K’ toolbar button. Apparently, ‘Call’ starts with a ‘K’ in the author’s native language:
A couple things to point out…The most recent call is at the top, just like the stack. ‘Includes’ means that this instruction was involved in the call, but Olly doesn’t know exactly how. A question mark means Olly is a little unsure about that line, so take it with a grain of salt.
In our specific example, we can see a ntdll function, some user32 functions, a call to DialogBoxParamA with arguments, some more calls to user32, and a call at the bottom from our app, WinRAR. Here is how to think of this: WinRAR, at address 442C44, called DispatchMessageA, in this case with a message to display a dialog box. User32 then called the DialogBoxParamA function to display the dialog box with the text “evaluation copy” in the title, along with some other arguments. User32 then displayed this dialog and is currently waiting for our input, using WaitMessage to do it.
The important things in this window are the call to the dialog box and the call from our app. Generally, when using the call stack, you start at the top and find the first item that you can use to find the code section you are interested in. If that one doesn’t work, you go further down the list, checking each function call until we get ‘back’ in the code far enough to find our compare/jump that determines if this function is called or not. Let’s try checking out the call to DialogBoxParamA by double-clicking that line:
and we jump to the call to DialogBoxParamA. I have placed a BP at the beginning of this set of instructions that performs the setup and call to display the dialog. Above it, we can see several conditional jumps which pop out to us. If you scroll up farther, you will notice some comments that say “Case XX (WM_Something) of switch 0043F0A4″ where XX is a hex number:
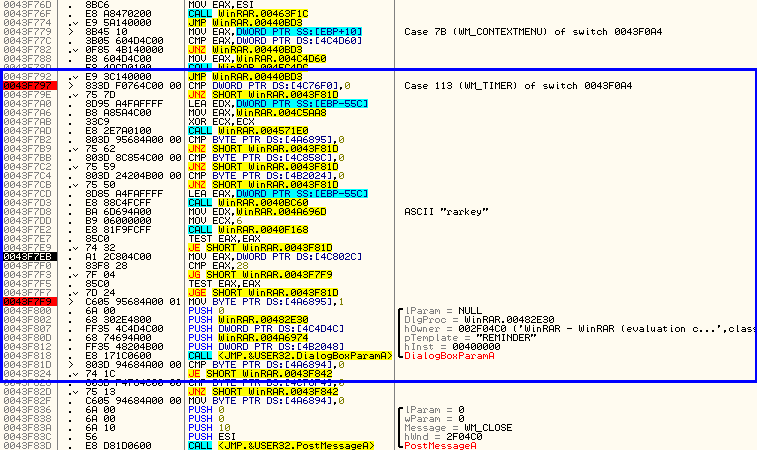
This is Olly’s way of showing a switch statement. If you scroll up, you will notice that this is a really big switch statement. If you have Windows programming experience, you will recognize the “WM_SOMETHING” statements as Windows messages, and you will recognize this whole section of code as a message procedure for Windows messages. Don’t worry if you don’t know anything about this as a future tutorial will be going over windows message procedures in greater detail. For now, we are only interested in the case that involves our call to the dialog box. Here, we can see the entire case:
You will notice that it is in the section that handles WM_TIMER messages. This is very telling. Why would our dialog box be in a message handler for when a timer goes off? We will see shortly…
Also notice that after the dialog is called there are several conditional jumps and compares:
These jump the execution of the app based on what we clicked in the dialog box; if you clicked “Close” it will jump to the code to close the window etc.
Scrolling back up to the beginning of the switch/case section we see that there is an initial compare and jump:
The jump here jumps over the call to open the nag dialog (along with a lot of other code). Let’s see what this initial compare/jump is. Right-click on the line that has the “Case 113 (WM_TIMER)” in it and select “Goto”:
You will see in the drop down window that Olly shows us several of the cases that can be handled by this switch statement. Clicking on “More cases…” opens a dialog showing us all of them:
Clicking on a couple of these and selecting “Follow” will take you to the code that handles that case. You will notice that at the beginning of all of them is a compare/jump. What this means is that the assembly language handles this switch/case statement as a huge if/then statement. It would look something like this (in psuedo-code):
if (msg != WM_CREATE)
jump to next if
Do WM_CREATE code
Jump to end
if (msg != WM_DESTROY)
jump to next if
Do WM_DESTROY code
Jump to end
if (msg != WM_SIZE)
jump to next if
Do WM_SIZE code
…
So, at the beginning of each case, we check if this is the case for the particular message coming thru, and if it’s not we jump to the next compare. If it is, we skip the jump and fall through to the code that handles the message.
Now, because our specific case is a WM_TIMER messages, we can learn (by looking up the message WM_TIMER on Google) that this message is a handler for when the timer goes off. That means that somewhere this timer must have been started. Scrolling up (quite a bit) we see the culprit:
So now we can guess how we can override this nag…
Patching the App
The easiest way is to make this message handler not do anything when the timer goes off. And the easiest way to do that is to make sure we jump over this case every time. So go to the beginning of this case (113 – WM_TIMER) where it checks if this is the correct case and change it to always jump:
and here’ s what the patch looks like:
Now, whenever this message procedure gets a message that the timer has gone off, it will simply ignore it ![]() . Run the app and you will notice after a while that the nag does not show up anymore:
. Run the app and you will notice after a while that the nag does not show up anymore:
The program still says “evaluation” in the title, but we will come
back to this in a future tutorial (as it’s a little more complicated to
change this- go ahead and try. It’s the best way to learn!) But for now,
even though it says “evaluation” it works fine and will never expire.
Well, that’s not exactly true; it will expire but it won’t do anything
about it ![]() . Make sure you save the patch (as we did in several previous tutorials) to keep the changes.
. Make sure you save the patch (as we did in several previous tutorials) to keep the changes.
The Second Way
Now, I am going to show you another method we can use (instead of the call stack) to find our dialog box section. Download Resource Hacker if you don’t have it already. You can get it on the tools
page. Resource Hacker allows you to view and manipulate the resources inside a PE file. We will get more into resources when we discuss the make-up of the PE file, but for now just know that any resource that the app uses (buttons, dialog boxes, bitmaps, icons, text strings) are stored in a separate section of the file, separate from the code that is. Really, the best way to see what I mean is to open Resource Hacker, load a couple of program in it, and just look around.So let’s do just that…Open Resource Hacker and load in our app:
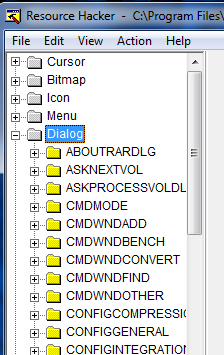
The tree on the left shows you the various resources that are in this app. You can see it contains bitmaps, icons, menus, and most importantly, dialog boxes:
There are a lot of dialog boxes in this app. Go ahead and click on the first one, ABOUTRARDIALOG:
Resource Hacker shows us the pertinent data to this dialog, including the caption (what appears in the title of the window), buttons associated with this dialog, and it’s various settings. It also opens a window showing us exactly what the dialog will look like, in this case the About dialog. After clicking through a bunch of them, you will come across the one we want:
Look familiar? Notice that the name of this dialog is ‘REMINDER’. Sometimes Windows uses names to reference a dialog box, and other times an ID. In this case it uses the name ‘REMINDER. Now we know all we need to- load up the app in Olly and go to “search for strings”. Let’s search for ‘REMINDER’:
and we see it in the list:
Double-clicking on it brings us to the same section we came to by using the call stack:
In fact, you will see that one of the arguments passed to DialogBoxParamA is the name, ‘REMINDER’. If the resource was identified by an id instead of a name, we could find it by right-clicking the disassembly window and selecting “Search for”->”Command”. Then enter into the box ‘PUSH xx” where xx is the ID (in hex) of the resource. This will take you to the call to the dialog box as well.
One More Thing
If you look around at the numerous tutorials on cracking this binary, you will see that one of the methods is to simply delete the dialog box in Resource Hacker. This does work in this case, and you will no longer see the nag, though this won’t work in every case- it all depends on how the program handles a missing resource. Given the simplicity of this technique, it’s always worth trying.
-Till next time
R4ndom
ps. Don’t forget to change your clock back ![]()


July 19th, 2012 on 8:51 pm
I liked the tutorial a lot.. I just wanted to point you to an alternative to ResHacker: ResEdit.net it has quite some nice features and can also be used for programming.
Greetings
July 19th, 2012 on 8:53 pm
Sorry for bumping, but another method is to screw up the hinst…
July 20th, 2012 on 12:08 am
Been a while, eXoDia. Yes, that is a good resources. You ever tried Resource Tuner? It’s the only one I’ve found to rip resources from VB and Delphi. Check it out.
July 19th, 2012 on 9:00 pm
Thanks for the speed the new tut’s are coming with
July 20th, 2012 on 5:41 pm
Once again you make a great tutorial. I am really learning a lot of techniques from your tutorials, but I am having some trouble applying them on my own. For instance, I took your advice and looked for an application on download.com and ended up grabbing a SolSuite Solitaire 2012 – I will try looking at the callstack to remove the nagscreens since I wasn’t sure how to work with that before. I am still struggling trying to find registration parts of it though, it seems when I search for strings I end up finding only ascii instructions on mailing addresses – and nothing really of substance. If you could take a look at it for a potential future tutorial or drop me some hints that would be awesome
July 22nd, 2012 on 4:33 pm
I’m looking at it…
July 22nd, 2012 on 5:15 pm
Thanks! I’ve been been working at it and I found out an area that appears to be doing some work on the input of the registration window – pumping it through an algorithm and then Xor’ing, comparing, etc. The only problem is I keep getting lost in the code because it appears to be obfuscated, and sometimes I feel like the comparisons and some of the variables it uses are false – and there is one section im missing where my actual entries are taken into account.
July 22nd, 2012 on 11:14 pm
have you tried using DeDe as this is a Delphi program? Will help in finding the right calls.
August 9th, 2012 on 3:49 am
Just ran through this tutorial. It was easy to follow and very informative.
One suggestion would be including how to export the patched executable. Had to search elsewhere for those details.
Thanks
August 9th, 2012 on 3:59 am
Well, as I’ve gone over it in the last 10 tutorials, I’m afraid that at some point I must cut the umbilical…
August 9th, 2012 on 2:00 pm
Aha. My fault, started from this tutorial first.
August 21st, 2012 on 12:34 pm
what kind of tool permit you to go to switch case condition???
Don’t know a plugins like that do exit?? does it?
August 21st, 2012 on 2:14 pm
It’s built in to OllyDBG
August 21st, 2012 on 7:09 pm
you’re right, i use olly for around 8years and i discover this functionality…i feel so ashamed.
August 21st, 2012 on 7:37 pm
I wish I could say that’s never happened to me, but I’d be lying.
September 5th, 2012 on 2:09 pm
I haven’t gone through the tutorial yet, just got to installing WinRAR so not much of feedback I got but there is an important point that I have to report:
You have to rename WinRAR.exe to anything [else], because the installation will fail to install correctly unless you rename it (I have no idea how WinRar failed to make a proper installation executable)
Thanks!
September 27th, 2012 on 5:53 am
You forgot to mention that if you are running Windows 7 64-Bit and using Olly 2.0 for the call stack then you need to install the call stack plugin, which you posted here: http://thelegendofrandom.com/blog/archives/2371
.Did you forget to include you needed a plugin because you use it so much that you forgot it was a plugin
July 20th, 2013 on 8:34 am
Any pointer of install OllyCallstack on Ollydbg v2.01 beta2?
Try extract to plugins directory but it didn’t work for me.
November 15th, 2012 on 3:59 am
R4ndom,
I have done all of the tutorials up to and including this one. I just want to let you know how much I appreciate the time that you obviously gave toward creating these tutorials for others. I feel like I have already learned from you as much as I would only have learned from years of experience on my own. I would totally hug you br0mance-style irl, man.
This was my favorite tutorial so far because I feel that it gave me the opportunity to test my new skills in a practical way as opposed to just trying them on applications that are specifically designed toward our purposes. I look forward to continuing through the rest of them when I get breaks from projects/studying
Thanks again!!
November 24th, 2012 on 8:39 pm
Please Help Me,
Most them telling that reverse engineering is the old method for cracking softwares and making keygens…. and also dll injection is the best way to crack a software is it true…? Please help me in this situation.. I got confusion in this… Mr. Random please help me….
November 25th, 2012 on 1:10 am
Not true, what is the point of injecting dll if you can patch a software with a single nop or mov al,1??
Dll injection is a technique which you must know, but it does not mean every software need dll injection.
November 25th, 2012 on 12:37 pm
SomeBody help me from this confusion
Is Reverse Engineering is Olden type of software cracking….? pls somebody help me… Or is there any other new technique is there for software cracking…
December 1st, 2012 on 12:35 pm
To add to what relhak said above, the plugin is needed and only seems to work in Olly 2.01 beta2.
February 3rd, 2013 on 4:00 pm
im using the latest 4.2 version of WinRar 32bit, but
main program entry is on very diffrent adress than 401000
and the REMINDER string doesnt even exist there, and cant run it in olly, it crashes saying 0×1 memory adress doesnt exist
February 4th, 2013 on 4:01 pm
@infestor
Try to reinstall Olly. Maybe the configurations are messed up…The entry point is different but the idea remains the same.
September 7th, 2013 on 11:56 am
I encountered “Exception 000006BA – Exception is non-continuable” exception while running WinRAR with OllyDbg v2.01 (beta 2).
This exception does not appear when I use R4ndom’s OllyDbg.
Does anyone know how to solve this problem?
September 22nd, 2013 on 11:00 am
I’m using Win 7 x64 and R4ndom’s OllyDBG 1.10 and I DO get the correct address in the call stack, and if I right-click it and choose “show call” it takes me to the exact same address as in the tutorial.